Git: GitHub Desktop / Git in VS Code#
User types
This page is useful for user type 4 and 5.
In this section you will learn how to install Git locally. Courses on Git usually make use of the command line interface to do run Git, but this introduces a steep learning curve. Instead, using Git from VS Code / GitHub Desktop is much more visual (i.e., more “clicky”), and therefore easier to use for those inexperienced with the command line.
Installing Git#
First, we need to install Git itself. Although this isn’t strictly required when using GitHub Desktop
Go to this webpage and download the correct version of Git for your system.
Execute the installer and go through it. You can leave all options to the default values, but make sure the option “Git from the command line and also from 3rd-party software” is selected. Without this option, we won’t be able to use Git from VS Code.
Once the installation is finished, check if everything works. Open the start menu, then type
git. From the search results, open the applicationGit Bash. This will open a terminal window, in which you can execute commands. Type in the commandgit, and execute it by pressing enter. If Git is installed correctly, you should see some sort of help page. If it outputs an error, then something may went wrong with the installation (you may have selected a wrong option).
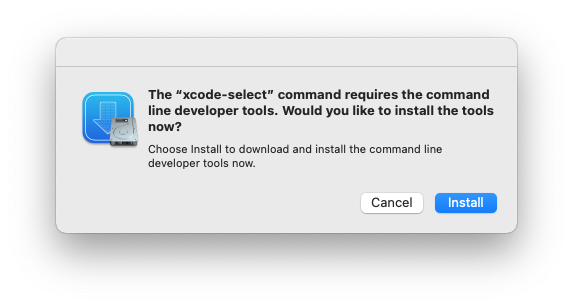
Open up a terminal window (Command + Space, type in terminal). Then, type the command git. If Git has been installed already, it will output some help. If Git has not been installed, you will get a pop-up that looks something like this:

Click on install. The installation may take a couple of minutes. Once it’s finished, check if everything has been installed correctly by executing git again.
Setting up SSH-keys#
When we want to visit repositories on GitLab or GitHub, we need to log in. The same holds if we want to interact with these repositories with Git from VS Code. This means that everytime we make a commit, pull, et cetera, we need to provide our password, which becomes very tedious. Alternatively, we can provide GitLab/GitHub with an SSH-key of our system, so that GitLab/GitHub knows it is indeed us that are making the changes to the repository, removing the need to provide a password. If you’re only using GitHub and GitHub desktop, SSH-keys aren’t strictly required, but it’s still advised you set these up.
Open up a terminal window (Git Bash on Windows). Next, type (or copy and paste) the following command:
ssh-keygen -t ed25519 -C "GitLab"
You will get output that looks something like this:
 Generating public/private ed25519 key pair.
 Enter file in which to save the key (/Users/<user>/.ssh/id_ed25519):
Press enter to use the default path (the one between parenthesis). Keep note of this path, as we will need to visit it later on.
You will now be asked to enter a passphrase. You can give one, but you will be asked for it everytime you make a commit, so it’s better to leave this field emtpy and use this key only for GitLab. After the command is done executing, it will generate two files:
id_ed25519andid_ed25519.pub. The.pubfile is the public part of the SSH-Key which we need.
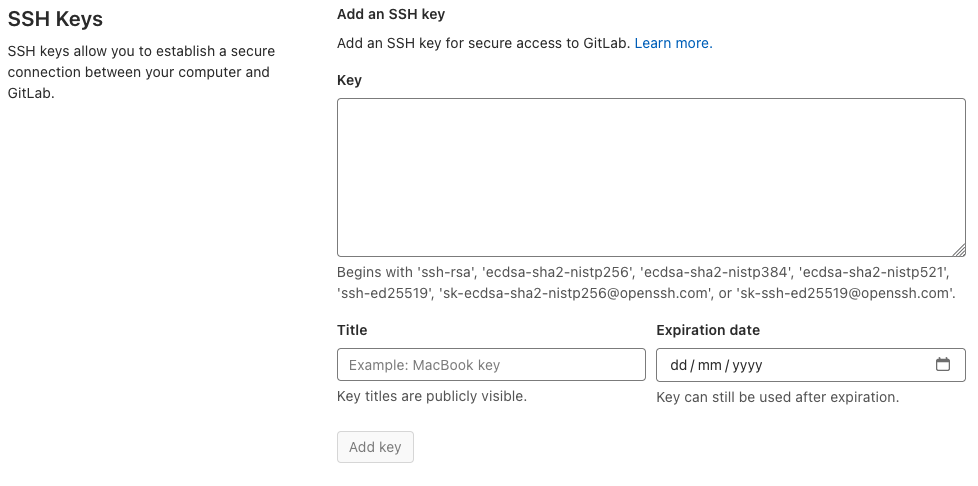
Go to GitLab and log in using your NetID. Click on your profile icon on the top-right of the page, then go to Preferences. In the menu on the left, go to SSH-Keys. You are now greeted with a screen that looks like this:

Navigate to the
id_ed25519.pubfile that we generated in step 2. Open the file with a text editor (Notepad on Windows, textEdit on Mac). Copy its contents and paste it in the ‘Key’ field of SSH-Keys menu. Give the key a Title and click ‘Add key’.Note
On MacOS, the
.ssh/folder is hidden by default, so you won’t be able to find it in finder. To show hidden files and folders, press Command + Shift + .Now test the connection. Go to the terminal (Git Bash on windows) and type:
ssh -vT git@gitlab.tudelft.nl
You should get a huge output, but somewhere at the end of that output it should say something like:
Welcome to GitLab, <netid>!
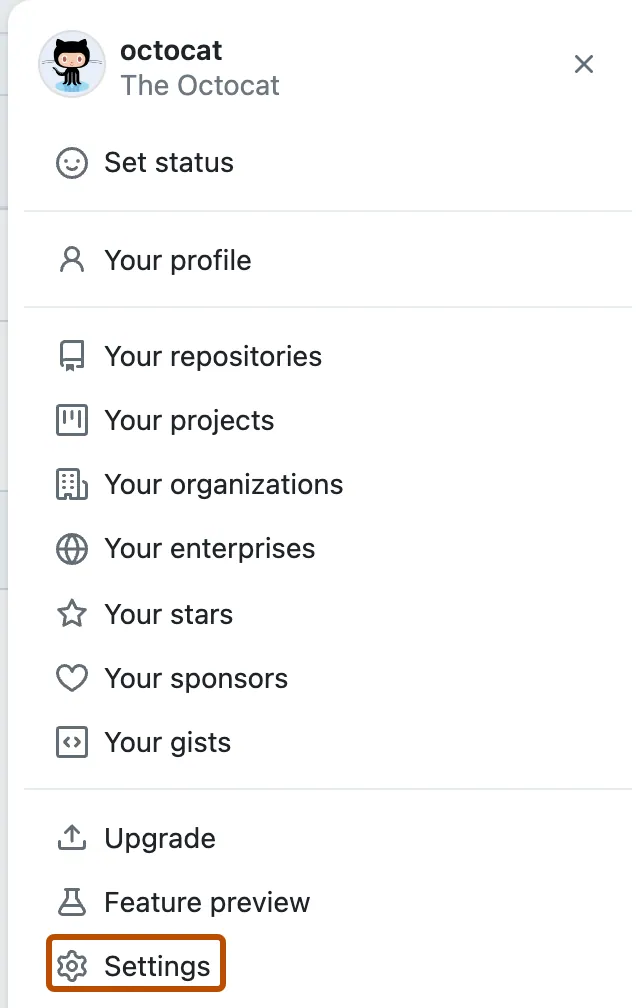
Go to GitHub and log in. In the upper-right corner of any page, click your profile photo, then click Settings.

In the “Access” section of the sidebar, click SSH and GPG keys.
Click New SSH key or Add SSH key.
In the “Title” field, add a descriptive label for the new key. For example, if you’re using a personal laptop, you might call this key “Personal laptop”.
Select the type of key: authentication
Navigate to the
id_ed25519.pubfile that we generated in step 2. Open the file with a text editor (Notepad on Windows, textEdit on Mac). Copy its contents and paste it in the ‘Key’ field.Note
On MacOS, the
.ssh/folder is hidden by default, so you won’t be able to find it in finder. To show hidden files and folders, press Command + Shift + .Click Add SSH key.
Now test the connection. Go to the terminal (Git Bash on windows) and type:
ssh -vT git@github.com
You should get a huge output, but somewhere at the end of that output it should say something like:
Welcome to GitLab, <username>!
Updating the local Git environment#
The final step is to provide a username and email address to Git, so our commits can be identified. To do this, in the terminal (Git Bash on Windows) type in the following command for the username:
git config --global user.name "<first name> <last name>"
And type the following command to set the email address:
git config --global user.email "<your TU Delft email>"
GitHub Desktop#
GitHub is a competitor company to GitLab. It provides very similar services, but they are often called different names, or have slightly different features. GitHub provides a free software that is very useful: GitHub Desktop! While GitLab is a cloud-based version control system built around Git, GitHub Desktop makes it possible to manage our Git repositories locally on our computers, even though they are stored on GitLab. This is very useful for working with the jupyter-book more extensively and work on interactive features. GitHub Desktop provides an alternative to Git in VS Code, and will be described on a later stage.
Terminology#
This is a (non-exhaustive) list of terminology that will be used in Git for local use.
Repository: a collection of files and folders, along with a history of their changes and who made them.
Commit: a snapshot of the current state of the repository.
Staging: preparation of files to be committed. During staging, we propose files to be committed.
Branch: a development line.
Local: on your own computer.
Remote: on someone elses computer.
Pushing: uploading new commits to the remote repository.
Pulling: downloading new commits from the remote repository to your local repository.
Tracked (files): files that Git knows about and keeps track of their history.
Untracked (files): files that Git does not yet know about.
More on GitLab/GitHub#
To get to know more about working in GitLab/GitHub and getting familiar with its features, click here or watch this video!